
Spring is coming, even if most think of January as the depth of winter.

Here in the PNW, even with a “modified Artic blast” freezing us periodically over the past month (it has flipped between chilly and blue skies/to rain and fog to blue skies and warm), the trees and shrubs are showing signs of coming alive. All my trees and shrubs have buds on them.

And my seed orders trickle in, this one is from Baker Creek Seeds, and yes, white and yellow strawberries are going in. And Quinoa 😉 Go big, or don’t garden!

It isn’t often I flip through a magazine, see an ad for a book and run to Amazon to order it. This one I did….as soon as I saw the current issue of Urban Farm Magazine, I saw an ad for Urban Farm Projects: Making the Most of Your Money, Space and Stuff
, published by the magazine.

New toys awaiting Spring, to be hung: A Ladybug House, a Mason Bee House
, and a Bat Shelter
.
So in all these projects, in the back of my mind, the greenhouse awaited. In a few years I would like a permanent building, one that I can be proud of. But knowing that I only have so much time and resources, I opted for a cheap(er) alternative to get through, while I put my gardening money into more raised beds – and getting a shed built (which is way more important! Kirk would like his garage back at some point….). And my Mother In-Law even bought me the Gardman 7622 Walk-In Greenhouse with Shelving for a holiday gift! How nice!
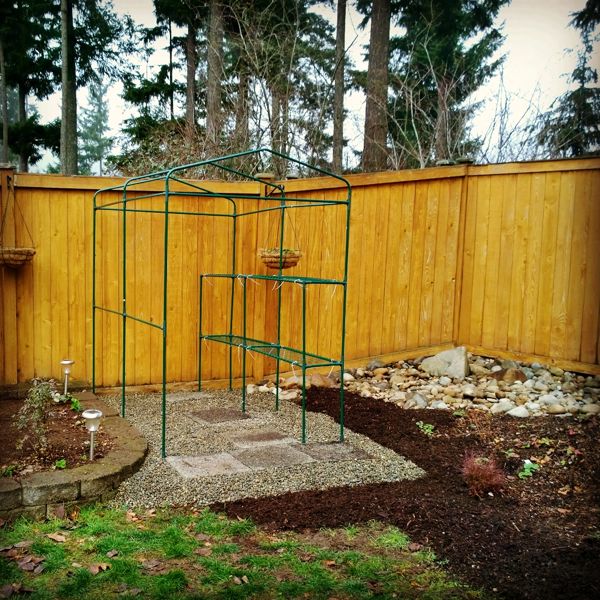
Finally, after a long dig, we got the majority of an old evergreen tree stump out. There was a bit left, but it was below the level, so I just covered it up. I packed the soil down firmly, and let it sit for a few days, to ensure it was truly packed down.

Then a layer of yard fabric. Once to ensure no weeds, but also to prevent a mud pit from happening.

Working on the frame of the greenhouse. To ensure it was reasonably straight/level, I constructed it on our deck. And yes, it was very foggy that day!

Once I had the frame I moved it to the site. The frame itself is very light and easy to move (though having a helper makes it quicker!) I had spare 16×16″ paver stones, so I put 3 inside for steps to stand on, and 3 in front. I used the included stakes this house has, to “hold” it down (staking). Personally, they don’t do a lot, but I figured I might as well use them.

I picked up 10 .5 cf bags of river rock in 3/8″ size. I filled in and around the greenhouse with it. Something I had pondered after reading reviews was how light the greenhouse is. Which I knew going into, and so I over engineered it. I figure this will be a permanent spot, so I wanted it to look nice – but also the gravel has two other jobs: One is for drainage, but the other is to weight it down. The paver stones are 2″ high, so I filled the rock that high. This ensured the bottom frame of the house was buried. I tamped the rocks down, smoothing them. Be sure to check a day later for any more smoothing out, it will shift a bit. Then I raked back in the bark mulch, that had been there, to make it look nice.
With portable greenhouses, the shelves are not of the highest quality. They are slightly bent, and rest on the shelves. If you put too much weight on them, you risk them going “Oopsies” and everything falls off. So use zip ties. Then your shelves will be on securely. I trimmed the ends after I took the photo.

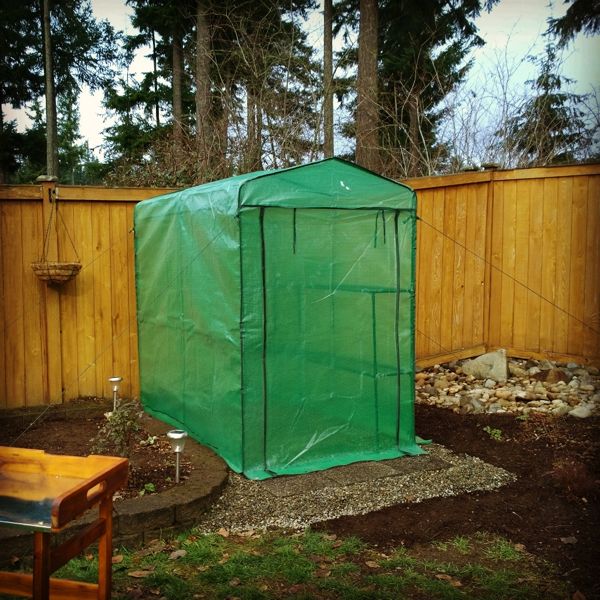
After finishing my river rock, and making sure it all looked good, I let it sit for a day. Then I came and put the cover over it, taking my time. Be sure to use any included cords for staking out properly. The greenhouse is light, you don’t want it to blow away! And having said that, the real issue with wind is with the cover, not the frame – think of it like an umbrella. So stake it taught and keep the door closed in bad weather. PS: I also added later 4 large rocks to each of the long sides. Again, never hurts to make sure it won’t suffer wind.
Since my greenhouse has only set of shelving (some have rows on both sides), I needed work space to work on. I saw a potting station at a local chain, Fred Meyer, that was $37. Which for this was a bargain. I didn’t need a huge area!

It quickly assembled and fit in perfectly. I could even fit in a second one if I wanted to……

Not missing a chance to stabilize the greenhouse frame, I zip tied the legs of the potting table to it as well.

I am 5’4″-ish and it comes to my waist. The top is galvanized steel. A place to pot, storage space under it!

Open for business!

I put a thermometer inside to watch the temps. It was 78* at 1 pm on Tuesday. 80* on Monday! Hot and humid to say the least…..

Which then led me to move my other mini house, to be closer. It had been in an awkward spot, that didn’t make it convenient for me to use it. It is lashed to the fence with D rings that are on the back. It has survived some really good winter storms, and still looks great. I have a feeling it will hold many of my starter seeds this spring. And as well, another new garden bed is in front. It was a productive week!

February 2nd we added a second one:

The only real issue came down to space though. They are not truly that big – and the first one only has 2 rows of shelving on one side. So I started thinking about a second one, flanking the garden bed with our cherry trees. This area receives a lot of sun in winter and spring.
Also prompting me was a friend, who was moving, offered me up cloverleaf pavers for free, if I came over and hauled. Done! I had an idea.

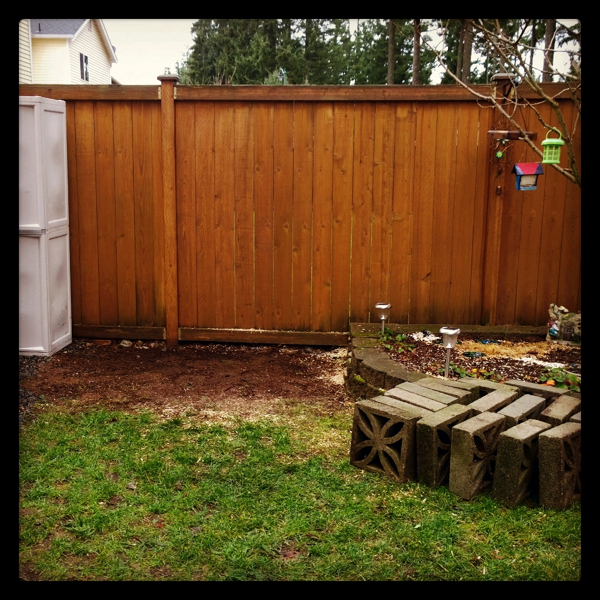
Sitting in this spot had been a severely ugly contractor special tree (and the same had been on the other side as well). Once cut down, the ground was packed. The little shed to the left is my well used “garden shed” that has shockingly held up well since May of last year (it is a Sterilite 4-Shelf Utility Cabinet).
This time I picked up a mini greenhouse from our local hardware store, which was on sale for $80. This one has shelving on both sides, three levels high, although the top shelf is more for resting things on. It goes together easily enough – I did the frame on our deck again, and moved it over (it is very light), so that it stayed straight when putting it together. Now then…one issue was the directions: they left a whole section out. Oopsies. I figured it out eventually, but lord it was annoying! As well, once you get all the parts in, make sure you go around a few times and squeeze everything together. The parts can and will shift a bit.

Since these greenhouses are feather light, you need to think about holding it down. This time I used the cloverleaf pavers to make a frame of sorts (always use yard fabric under!).

Then I filled in the floor once again with 3/8″ pea gravel (small river rock). I also filled in the blocks with the gravel as I like the look. I like the rock to be deep enough you cannot see the bars of the frame. This adds weight as well. Cover on and yep, kids in there already!

The two mini greenhouses flanking the bed. The nice part is you cannot see them from the back side of the fence as people walk by on the trail behind us. I like that!

I decided this one could have many of the seed starts in it. Also, notice the zip ties. As I mentioned in the first greenhouse post, do not skip this step! Zip tie the shelving down tight to the frame. Otherwise they are simply resting on it, and they can fall off. Which will dump your plants!

I’ve been working on seeds that will need time to germinate and sprout. This is a first for me – we shall see how it goes!

Last Monday was an amazing day though. It was a mini heat wave that had lasted for a few days and was at least mid 60’s by noon. It felt like summer and I didn’t want to go in!

We even had a picnic outside….

And for those dreaming of a greenhouse?
Click to Enlarge Image

This is awesome I really like what you are doing especially on how you started it step by step appreciate it. Lovely set up on your mini portable greenhouse.