Gardening · Homesteading

Gardening On Whidbey Island

As February nears, the call to get gardening is at a frenzy. The nice weather we get in late January doesn’t help either. Often in this time period we get “first spring”, a week or two of sunny weather where the start of spring starts popping out (buds start forming, dandelions pop up, trees start to show life). You must ignore first spring though. For winter will be back. Don’t give in.

That doesn’t mean you can’t start ramping up to gardening season however! And…you should. There is plenty to do, to be ready for when the sun returns high to the sky in the north. I’ve included a list of articles we have written about gardening on scenic Whidbey Island, Wa to help you plan out your year – wether you are a seasoned gardener, or a complete newbie. It doesn’t matter if you have just a balcony, or 5 acres – you can grow something this year!

The Basics:

  • Whidbey Island, Wa is considered Grow Zone 8b. Now then, there are some microclimates around the island, especially in the low hollows (Maxwelton, Possession Point are two areas) or at the higher points on the north end. But in general, 8b can be trusted. The last frost date for Grow Zone 8b is on average April 15th, and I highly recommend you don’t put out your tomatoes and similar into the ground until Mother’s Day Weekend in May. Do that, and you will be solid all around. If you are in a microclimate, you will notice it within a year.
  • In general we have mild winters, with short freezes and snow for a couple of days. Our fall thru early spring tends to be wet. Summers are usually warm and dry. Though only hot for short periods of times.
  • Due to the Olympic Mountain Rainshadow, some areas of the island get far less rain, where as the north end and the tip of the south end get a lot more. Plan for this.
  • Keep a gardening journal. Every year. Note when you start seeds, when you set them out, when you seeded in ground. What grew, what didn’t. Mark the weather. Take a lot of photos. Especially when there is snow or hail. I can go back many year and know when we got cold snaps. To remind myself to not start too early.
  • Get your infrastructure done when it’s still cooler out. Weed existing areas. Top off with more soil or compost. Build raised beds, open up and till the land if you want in ground. Our ground rarely freezes on the island (outside of the once or twice a year Frasier River Valley freezes that come down from Canada.) It’s just a lot easier to work under a lower sun, in the 40’s to 50’s than rushing in April in the heat. And…if you weed now, then the weeds never get a chance to grow big – and get bigger roots.
  • How much to grow. I sat down and wrote this article for myself. Because it’s just that much easier if you have a guide to go off of.
  • Consider chickens. They are easy to handle, give you eggs and manure, and help keep bugs at bay. Even in towns, you can often keep a couple hens. Children can help in taking care of them!
  • Start a compost pile, and eventually you will have free compost soil to use.

The Articles On Gardening:

When To Plant Seeds (Read this one first!)

February Garden Tasks

March Garden Tasks

April Garden Tasks

May Garden Tasks

June Garden Tasks

Late Summer Potatoes

Planting Fall Crops

Planting Garlic

Planting Fall Onion Sets

Savings Seeds

5 Months To Prepare Your Garden (Why working in fall is good)

(Growing food is one of the most freeing things you can do!)

Other Articles About Gardening, Farming, and Homesteading To Read:

Why We Don’t Use Grow Lights

Letting Chickens Have The Winter Off

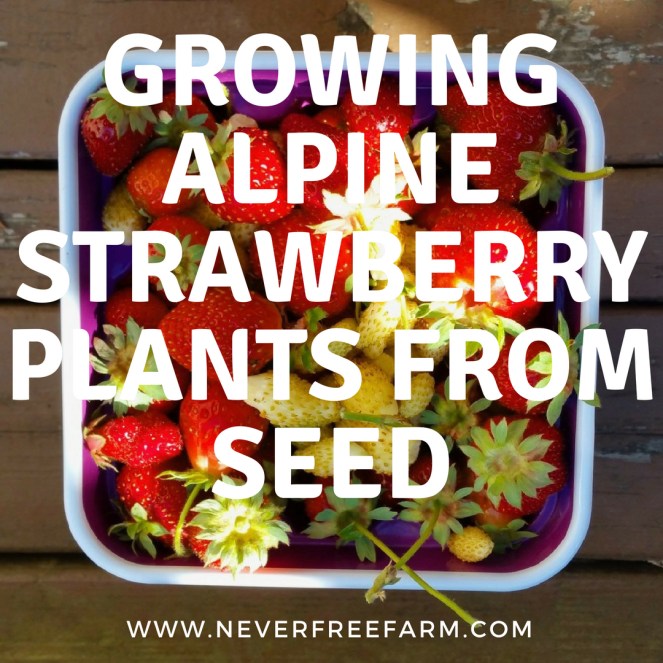
Growing Alpine Strawberry Plants From Seed

Building A Strawberry Bed

Making A Seed Vault (and seed packets)

Using Silage Tarps To Prep Beds

Dealing With Microclimates

Swimming Pool Raised Beds

Raised Beds From Reclaimed Trees

Felled Tree Raised Beds

Cinderblock Raised Beds

Building New Garden Beds (urban homesteading)

Build A Kinder Garden

Grow Food, Not Lawns (How to grow in urban areas)

Build A Simple Hoophouse, Get 3 Season Growing

Prepping For Early Frosts

Building a Sunglo Greenhouse

The Money Pit of Heating a Greenhouse

The Survival Garden

~Sarah

Gardening · Homesteading

Top Ten Most Read Gardening Posts For 2021

I wrote a lot about farming, homesteading and gardening in 2021. Well, when I had time I did. This year kept me busy on the homestead, with more crops than ever. The most read this year were a mix of 2021 posts and ones from previous years. May this give you some winter reading while you wait for the first signs of spring.

When To Plant Seeds For Grow Zone 8b

The #1 post because if you are hyper local, this was a post to get people going. I wrote it for myself – so I’d have a record on what to do, and when to do it.

Growing Garlic In Zone 8b

We grow amazing garlic on Whidbey Island. Learning to grow it took me a few years to get the how to, but I got there.

What To Plant In Grow Zone 8b In June

I started writing monthly posts when I had time on what to get done by the month. June was a very popular one.

It’s Time For Fall Crop Planting

It was June, but I was trying to get my readers prepped for the long fall.

Growing A Garden In Zone 7 (and 8)

This was an older post, but still popular.

February Garden Tasks and Seed Planting (For Zones 7-8 PNW)

An older post as well, but very popular. February is when the urge to plant hits a lot of us….

February Garden Tasks & What Seeds To Plant

An updated version of the post above from this year.

It’s Not Too Late! What To Plant Now In Grow Zone 8b

People hit May and think they have missed the window to grow – and yet they have so much time left.

March: Garden Tasks and Planning

Spring beckons!

Growing Alpine Strawberry Plants From Seed

Growing alpine strawberries isn’t easy, but isn’t hard to learn how to. It’s very fulfilling to learn!

~Sarah

Gardening · Homesteading

Are You Winterized?

The Winter Solstice was yesterday, and the temperatures are finally dropping into winter territory.

We may see snow in the lowlands of Western Washington this coming weekend – but we will definitely see cold temperatures.

This is your chance now to take care of homesteading chores to ensure you can prevent or mitigate damages.

Today will be rainy, but nearly 50* where we live. So at least it won’t be cold while you run around. What do you need to do?

  • Clean out animal coops/shelters and put in new hay/straw/wood chips, and do it thickly.
  • Do any of your shelters have a leaky roof? Go buy a cheap blue tarp and use zip ties to get it on.
  • Do the chickens have a dry area to get into to do dust baths?

  • Clean out water devices and pails. Fill them fully.
  • Ensure you have a rubber drinking bowl/pail in each area that you can kick to break the ice, not just plastic or metal. Plastic can break in deep freezes.
  • For chickens make sure their feed containers are well filled.
  • Check the birds daily for eggs, so you get them before they potentially freeze.
  • Feed your animals treats every day that are high in calories and fat. We feed our birds sunflower seeds, they are cheap and keep them fueled.
  • Be wary with using electric heat in coops/shelters. The last thing you want is a fire in it.
  • Drain your hoses.
  • Most field hydrants are frost safe, but remove all hoses from them and turn off.
  • Put insulators on your bib faucets and remove all hoses.
  • Drain anything that has collected rain water over the fall rainy season.
  • If you have winter crops going such as lettuce, spinach and chard, cover with frost fabric.
  • If you have plants in your greenhouse, and it isn’t heated, cover the plants with frost fabric (we have Aloe Vera plants in ours). Consider bringing into the greenhouse (if you have one) any small pots you have over wintering that you are concerned about.

  • If you have plants outside that cannot go below 20*, such as citrus, this is the time to get inside (greenhouse or garage) or get it wrapped with frost fabric.
  • If it snows, do clear the roofs of your coops/shelters often, as they are not built to handle the weight – and our snow is often heavy with water.

And then you can hide inside, out of the cold, and wait for it to blow out. Stay safe everyone! Stay home and be safe off the roads if you can.

~Sarah

Gardening · Homesteading

October On The Homestead

October just slipped by. I blinked and it was gone. It started out cold, and ended cold. With a warm and very wet middle. So not too far off from normal weather, no matter what people claim.

We worked on the lower field at the start of the month. The darker side on the right is the part that is new, it hasn’t been planted before.

We will be putting up two hoop houses on it, with plenty of room left, come late winter.

The gravel part to the left is where the cargo container sat for a couple of years. We will be smoothing it out and putting our greenhouse here, in its permanent home.

With having moved the cargo container off of the field, I no longer had my wall of signs. I did however have a wooden post left over from a political sign last year, so I made it my new sign post!

Rooster hanging out with the ducks.

We worked on getting the beds ready for the coming cold.

I harvested most of the beets at the end of the month.

Wherever we have chipped wood piles, the fungi shows up with the first rains of fall.

They especially love Alder trees being chipped. The fungi is so good for the soil.

As the trees turned yellow and orange, in the 3rd week of October the Olympic Mountains got their first snow dusting.

I love random flowers that grow from seeds that blew in the wind. These I grew 2 years ago a bed away.

As October slid into November we dropped under 10 hours daylights. It’s dark out.

On sunny days it is good still. The chickens waffle from 1 to 8 eggs a day. A number of the hens are in winter mode for now. And that is OK. I lost another hen to an eagle attack at the end of the month. I hate when they kill and rip the hen up, but don’t take her. It’s so wasteful. But the key is to have enough hens (more than you think you need) to help with losses.

And at the end of the month, the skies cleared and we got cold mornings. It said 37, but it definitely had the first light frost.

On to the deep parts of fall, and into winter. These are the weeks for planning and dreaming about next spring’s gardens. Checking on the hens daily. And staying inside toasty as the days slip by.

~Sarah

Gardening · Homesteading

Prepping For Early Frosts

Last night was chilly. All it takes is a clear sky at night in October and the temperature drops quickly. While the first frost usually isn’t harsh enough to kill off delicate plants like lettuce, it can, and does damage them, so it’s time to get them protected. And as a bonus, it will extend their growing life considerably.

All the rows planted for the fall and winter are covered in straw/hay.

Since I don’t have a lot of lettuce growing, and the lettuce is short still, I did a quick solution. The key is to make some hoops with whatever you have on hand. Save that cash.

Having refound a bunch of circular plant supports I had been given, I pushed one end into the ground on one side, and the other side on the far side of the bed. Each section I needed to protect I used 3 to 4 hoops.

Then I cut a piece of frost fabric to cover, and clamped it on, making sure I pinched the ends.

And done. Now I can sleep not worrying about early frosts in this area.

But….of course I needed to think about November and coming hard frosts/freezes/snow. It was time to put up my DIY Hoophouse. We made this years ago, when we did urban farming, but it still has a use in our rural homestead. It covers low growing crops quickly.

All set up and ready to be wrapped when needed down in the field.

It can be used in both Fall, and for early Spring.

I came across a copy of Gardening Under Cover: A Northwest Guide to Solar Greenhouses, Cold Frames, and Cloches, from 1989, through our library system and got sucked into it back when I built this in 2015 the first time – a guide for the PNW, written in an easy to read, but not necessarily deep, method. Pre-internet this was as good as one was going to find for low-tech methods.

The concept is easy, and so is the shopping list:

  • 3 to 4 ½” PVC pipes (10 feet long)
  • 1 1″ PVC pipe (10 feet long)
  • Cover of choice
  • Large Binder Clips

The PVC pipes can be found at hardware stores, are usually made int he USA. Look in plumbing. The first step is to measure and cut the 1″ inch PVC pipe into 10″ sections. For ease in cutting, my husband used a DeWalt Power Miter Saw with a 12-Inch Thin Kerf Crosscutting Miter Saw Blade. He cut a bevel at a 60 degree angle. This allows them to slip into the soil easily. Be careful when doing this type of cutting, as you are close to the blade. That I let Kirk do for me.

I store them in a large plant pot when not needed, out of the sun. Not one has cracked in the past 6 years. 

(This is from the original post I did back then, in the end of 2015.)

I did a trial run on a back bed, that didn’t have plants in it, to get an idea how it would work. First, depending on the length of your bed, you will need 6 to 8 of the cut 1″ pieces (Each 10 foot section produces 12 sections, so in theory you can produce 2 beds from each one). The beveled edge pierces through even hard packed soil, using a Dead Blow Hammer, pound them in until it is about ¾ in the ground. Do all of them, spacing evenly.

To put in the hoops, push one of the 10 foot long ½” pipes into a holder, then gently bend over and pop into the other side. Just like tent poles really!

You’ll find on the first one you might be pulling out poles and redoing it, as they won’t be lined up evenly, or one holder is not as deep as the other side. By the time I got to the 4th bed, I found it going much quicker. And they don’t need to be perfect…..

On to covering the hoops: It needs to be 10 feet wide to cover side to side. The frost fabric lets through light and water, but keeps it 4 to 10* degrees warmer. It also doesn’t cause your plants to overheat in fall temperatures, where as the plastic covered ones can quickly, if not vented. As you can see, I let it hang loosely, and didn’t clip it back unless high winds are predicted, or heavy rain.

A couple of friends clued me in how to clip the fabric to the poles easily: Large Binder Clips. The 36 pack on Amazon is a deal compared to in store 12 packs. You will need at least 12 per bed. They work better than any other method I have seen online!

Once you have your cover in place, start at the top and put in a clip on each pole on top, then one at the bottom, and for best results, one in the middle of each pole, preferably on each side. If it isn’t windy, you can use less. For here, with 4 poles, I am using 20 clips.

For real cold snaps I used 4 mil thick plastic sheeting. You can find it hardware stores in 25 foot and 50 foot rolls, often in the paint department. If you want thicker, you could go up to 6 mil. 4 mil is quite durable though. I decided to make a door, and simply split the plastic with scissors (or a knife). I can roll it up and use a clip to hold it open. In high winds, you will want to seal it up tightly, and cross over the plastic, using clips to secure it. But otherwise, until winter, this will stay open on one side to keep the temperature even. My mini greenhouses can easily soar to 100* on a 70* day, so keep that in mind. You don’t want to scorch and kill your tender plants! As well, plastic doesn’t let water in, so remember to water on a regular basis, more than you might expect, as it will be warmer and evaporate.

Enjoy, get building, and protect your fall crops.

~Sarah