Gardening · Homesteading

Filling The Greenhouse

It’s many weeks till spring, but the greenhouse is slowly filling up. There is a tale to this though. When we moved last March, we brought our Sunglo greenhouse along. It got dropped off onto the lower field, and ever so slowly we have been making a new pad for it. However…as with all things, sometimes projects get bumped down the list. We couldn’t cut the land open till the fall rains came, and then it got too cold to finish the framing of the new spot.

Below, through the fencing, the scraped out spot awaits, next to the garlic bed.

But, I was running out of time. I had to start the coming spring’s seeds. Finished or not. So I made the decision that I’d get it going. I can always move the trays out when needed, once the new foundation is done! I just have to pay attention to the ventilation as the fans are not hooked up. The local feral domestic rabbits that live all over, like to come down to this field. It’s a hard road – they are cute and will let you walk right up to them, but that is a bad thing. They eat crops and carry disease, so it falls into the nuisance category.

Over the last spring/summer/fall the greenhouse just sat out there. It had a few things in it, but thankfully the grass is pretty much dead under it. We spent two days cleaning out boxes and leaving behind things I needed. Some supplies got left in for when we move the greenhouse over.

Trays being filled with planting medium, and seeds started……

And it continues, till we run out of space……

And slowly, our land becomes a farm….

~Sarah

Gardening · Homesteading

Moving A Sunglo Greenhouse

When Kirk and I got serious about the move from the urban homestead to rural land, we talked a lot about taking our beloved Sunglo Greenhouse with us. Beyond the fact that they are not inexpensive, you can upsize the greenhouse with easily added parts, to make them longer. It’s an investment, that works amazingly well. Read here for how we put our greenhouse together originally.

As the move got happening, our old place was full of items to be moved (yes, we moved our water tanks as well). The greenhouse was emptied of everything. Not knowing what would happen, I gave away every plant in it quickly to trusted friends (for example, the citrus trees were sent to a fellow female farmer who has a greenhouse). Originally we were going to break the greenhouse down, reversing the put up. And that would have been two days of work, which we didn’t have the time for. Kirk talked to Sunglo (they are located in Kent, Wa and not far from our old house) and they mentioned they could move it. In one piece. No tear down needed.

We thought and thought, weighing out the cost of moving it, versus our time to tear it down, then rebuild, but also that we’d have to move it in a trailer rental, cost of the ferry both ways. And frankly, having it moved won out.

Early in the morning on the big moving day, Sunglo was here, a 2 man crew. They popped the greenhouse off of the foundation.

With 4 men, they got it up. We did have to take down, and then repair part of the fence, but no loss, as the fence isn’t in the best of shape.

The foundation, which we left in place. This way, if the new owners wanted to put a greenhouse in, they had an amazing, ready to go platform. With electrical and water conduit piped in.

The lifting and moving of the greenhouse. We asked if a couple of the movers could jump in, which they did.

Loaded up. Our greenhouse is the size that Sunglo takes to home and trade shows, so it was easy enough to move.

On the flatbed, tied down:

They handled the rest, driving it up to the island, over the ferry and to our new place, where they unloaded it, with the help of my brother, there. We need to build a new foundation, but the hardest part was done: it is built. Once the new foundation is ready, we will move it into place and screw it down, and back in business.

Homesteading · Urban Homesteading

The Lies, Half-Truths and Money Pits About Homesteading: Heating A Greenhouse

A greenhouse can change a homestead or small farm. No doubt about it, it can stretch your growing season by months, on both ends, and if heated, and with grow lights, you can produce food year round. But there is one downside:

The high cost of heating it in colder months, especially if you live farther North.

Our back story to how I spent way too much last winter was a long lesson to get into my head. Our first years on Never Free, I had cheap “disposable” pop up greenhouses (think $100 or less, a metal and plastic frame with plastic cover). While they worked well enough to keep plants wintered over and mostly alive, they are not truly a greenhouse. I only got about a solid year out of them. Even my favorite, below, the cover rotted as the second winter hammered it. (Having said all this, if it is all you can budget, it works well for what it is. You can’t do everything, but you can at least get plants started in early spring…)

In 2016 we bought a Sunglo greenhouse and built it. It was a large undertaking, but well worth it.

In the winter of 2016-17 I went crazy in it. I was growing kale and lettuce in late fall and early winter. We had strawberries all winter. My many citrus plants. The greenhouse hummed along. As winter turned into spring, I started the tomatoes, herbs, and strawberry seeds. Finally, by May my greenhouse was empty and it was all in the ground growing, or sold as extras.

In the winter Kirk realized we were using too much energy. We turned down the heat to save money. We only had it kick on then at around 45*. Well, even that was expensive. Even at 40* it was brutal. The harsh truth is, even if you have a well insulated floor, as our does, and double layer walls, greenhouses are going to be drafty. The vents may close, but they are not insulated, this is where they leak. It is a very bad use of energy. Even with those final months cutting back on the heat, our electricity bill was outrageous. Any profits we made in growing food was burnt up by the cost of the energy.

So why didn’t we use solar energy, like we do year-round to run the fans? We are too far North in the Pacific Northwest. In late January we have barely 9 hours daylight. Our panels can run the fans in winter, but the energy hog heater it cannot power. The sun is too weak, too low, and too often it is hidden behind the clouds. If we lived farther South it might be different. The other issue is the heater that came with our greenhouse is nothing more than an old school space heater. It is an energy hog. It’s simply takes too much energy to power it, and would tax our already taxed solar system.

So for the 2017-18 winter we were much more conservative. I unplugged the heater, and instead used a roll of frost fabric to cover the citrus trees, taking a hack I used in the pop-up greenhouses. I dragged the citrus pots away from the walls (less foot space, but oh well, the plants stayed warmer), stuck in each pot a wooden stake, and draped the fabric over the plants using the stake to keep it up, holding the fabric on with binder clips. Frost fabric can provide about 5 to 10* of protection. It doesn’t often get deep freezes here, so plants will survive if protected. Our aloe vera plants we put on a shelf up higher, and did similar.

How did it fare? I was concerned when we had a week of Arctic freezing, but decided I would just trust in the fabric. I didn’t plug in the heater, no matter how much I wanted. And then a week of snow came as well. And I waited.

What I found was due to our excellent insulation, there wasn’t condensation this year in the greenhouse, with no heat on. During the day it often reached the 70’s and 80’s inside. I love working in it on a cold day, it’s very toasty inside. On hot days, the fans kick on, using solar power.

Recently I checked on the plants, to see if they needed watering, as we had many sunny days. While watering I was amazed at how healthy the aloe vera plants were. Thick, sturdy and no blackening. If anything, they are thriving under the frost fabric. (And as you can see, we are starting to ramp up for the coming spring production.)

Another thing: last spring I noticed some of our citrus plants had been too close to the grow lights. It led to the trees growing rapidly, and left them weakened overall. Most of the plants I had to cut back severely before fall came. Lesson learned. Citrus doesn’t like grow lights.

The other bonus is at night it got cold enough to finally kill all the fungus gnats that had gotten into the greenhouse. We had a batch of soil that was contaminated last winter, and I constantly battled the (mostly harmless) but freakishly annoying bugs. Like mosquitoes, they go right for your breathing and you end up having them try to fly into your mouth or nose. A good freeze is always good for greenhouses…..

So the lesson? Watch your energy consumption. You will have a hard time justifying heating your greenhouse after a few month’s of bills. Use passive methods to keep plants alive. And treat winter as a time for the greenhouse, just like the fields, as resting time, if you can. And invest into a roll of frost fabric asap.

As a side note: We are still looking for a heater that isn’t an energy hog, that can run on solar.

Gardening · Homesteading · Markets · Urban Homesteading

Profitable Market Gardening Workshop

Kirk and I had the chance last week to attend Green City Acres “profitable market gardening workshop” in Kelowna, British Columbia.

Kirk and I have had dreams and plans for the farm/homestead, and while we are making headway with that, we needed help to achieve it all. How do you take your goals/wishes/wants and make it happen? Sometimes it feels so overwhelming, to go from gardening to farming.

So we drove 6+ hours to Canada to take Curtis Stone’s first class on urban farming and how to be profitable. Green City Acres is his farm, which is a collection of lots (land) that they farm on, doing high density/rotation of higher value crops. The class was split between inside and outside, in the field.

The flagship plot is easy to spot, and it’s a beauty. There is no house on the lot, meaning the entire lot is used.

We got put to work, even on day 1. Here we were getting instructed in a Greens Cutter.

If you have watched Curtis’s videos…this is the German 😉

I walked out with a lot of knowledge and how to put it to use.

5 burner flamer. For when a 1 burner isn’t enough 😉

Just remember kids…keep the blade away from your legs…..

One highlight during the week was talking tomatoes. I grow a lot of them. But I have always grown mine as “field tomatoes” so had wanted to learn in person on this subject, which was led by Roger:

A lot to take in, but again, it puts me where we want me to be. (Does that sound odd? I am sure it does)

Some of the days we worked at the ‘home base’ at Curtis’s home. This is where they grow micro-greens.

Learning to do flats of micro-greens.

Peas!

Pea sprouts.

Sunflower shoots.

Second type of pea shoots.

Washing produce.

From growing to bagging.

This is an incredibly pretty salad mix.

Curtis talking front yard growing.

Salad blends (which we harvested).

A lot of tool talk, and hands on use.

Curtis with his BCS – we have one coming which will help us bust our glacial till soil up….finally. It has been the hugest issue for our dreams.

Hands on time helps a lot to shorten the learning curve.

Plots….and more plots. A lot of visiting.

Setting up a cat tunnel.

And as well, tearing it down.

Kelowna is a flat city and easy to walk. So much to see, and a lot of urban gardening going on.

One of the plots, having its front yard being removed and getting ready to be worked.

The back yard of the plot.

Another plot, which was one I recognized instantly from his videos.

And to that……it was a great (and educational) week.

Gardening · Homesteading · Urban Homesteading

Raising The Greenhouse

Marriage warning: Building a greenhouse can be a great activity. It might also cause fights 😉 Just remember that. Thankfully we apologize. Eventually. Lol….

img_20160930_163718

This all started with a lengthy discussion of where to put a greenhouse in the backyard. Maybe I should have kept my mouth shut 😉 It would have involved a lot less work…lol

20160324_154538-1

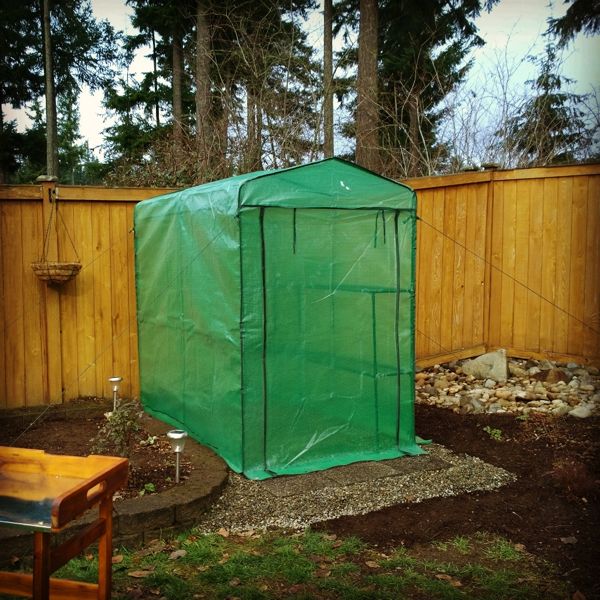
So less than a year ago, when we started the project….we put in a framed kids play area. Which turned out the boys hated. Sigh. It was just too hot, always in the sun.

IMG_20160404_221413

So like normal people….we moved the whole stupid thing across the yard, to the area behind the house. It is only in the sun for a few short hours, so is useless for gardening. The house happens to shade this area nearly all afternoon in summer.

IMG_20160405_154712

Did I mention we had to move all that stupid mulch a second time? I never want to do that again!

IMG_20160405_154901

Although….now with it moved, the boys are out there all the time. It’s in the shade in the afternoon! And they love picnics right out of the back door at their little table. They went from never playing out there, to being outside a lot more on it.

IMG_20160405_172838

Once everything was moved, well we had a huge 20 by 20 foot square that was mostly flat and grass/weed free. Then we started thinking about do we build from scratch, or buy a kit?

IMG_20160413_103528

I knew SunGlo Greenhouses was made locally, just a few miles away from us in Kent, Wa. I called, and asked if we could come look in person. They even gave Kirk a tour in the back of their manufacturing area. I loved the look of them, with the elegant “onion” top.

IMG_20160419_100256

Two little boys playing inside one of the examples….

The long story is that after we had looked at them in person, we were sold on it. US made, by a local company, able to handle high winds (80 MPH!!) and designed by Boeing engineers….these greenhouses are nerd-tastic.

Then I noticed that they were being sold on Costco in 2 models, for a considerable savings. And they came with all the goodies – the heater, the racks, everything. We ordered that night. And the best part? The guys actually delivered the parts to us personally within a few days. Talk about service. They even talked about our site prep and all that.

I am not going to lie….it isn’t easy work to build one. That is, if you do it right. Trust me, I’m lazy. Thankfully Kirk isn’t and is a stickler with his levels…..SunGlo actually comes with highly detailed instructions, so you will do it right. That is the difference between a US made one, and a cheap import from China (cough Harbor Freight Tools cough). Really read the instructions. Realize it won’t go up quickly most likely, especially if like us, we do it after work, and on the weekends. We can’t work all day out there, as it gets really hot midday. Any questions we had though, the company was happy to answer. And Youtube. The videos for installing it were extremely helpful.

IMG_20160418_123610

So, with everything humming along…the digging started. We used the tiller to break up the land, then dug it out. We used the extra soil to fill in a bed we were making. So. Many. Rocks. I came up with many ways to use those rocks I might add…..In the end we went down 6 inches, which here with Cascade Concrete felt like 2 feet!

IMG_20160418_123406

Another view of the dug out area. We decided with the space it would go greenhouse, walk path, then garden bed.

IMG_20160430_145036

As we put in the foundation. The greenhouse is 12 feet long, but can be extended with kits. So we carved it to 15, and built the frame so we can easily add it on.

IMG_20160505_141303-1

After the foundation was built, we lined with plastic, then sand to level, then insulation, then gravel (with more sand in it) and leveled that. Why so much? This is to help with the insulating of the greenhouse for winter. We won’t be growing in the ground, and will run the heater in winter, so very important.

IMG_20160505_204153-1-1

Foundation done. It was a job in itself. I learned a LOT doing this, and am glad Kirk taught me. I felt like I had accomplished something pretty monumental for myself!

IMG_20160509_225429

First wall supports going in.

IMG_20160509_225804

Lower 3 walls done and capped on top!

IMG_20160602_083343

Putting in the double walls was a bit tricky at first, but with a lightly soapy solution in a spray bottle, we got it done. You really need two people to do the ceiling.

IMG_20160601_083610

We added in the shelving system, which Kirk stained. You can pop out sections of the wood, as needed.

Overall, we built 99% of the greenhouse in Spring, then let it sit all summer – in fact, the door didn’t start shutting at night until late September. During summer, we ran a box fan to circulate air, powered off our deep-cycle RV batteries (that are fed by solar panels). This winter, we will run the included space heater via solar power as well.

img_20161011_112802

The last major thing we did was this past weekend – we finally installed the two upper black vents (one on each end). There wasn’t any reason to do it till it got cold, we’d have left them open anyways.

The citrus trees are inside now, and quite happy, though I need to position them still (when built the foundation, we brought in plastic conduit pipes for the water and electrical – and we haven’t finished that interior part yet.

img_20161011_124906

However, one huge thing I have noticed as the nights gets cold is our foundation worked perfectly. There is no condensation inside! With our previous pop-up greenhouses we had (that were fabric), it was always so wet inside. I hated going inside it, as I’d get a shower. Literally!

It wasn’t easy. It wasn’t’ fast. But I can say that I am very happy with our greenhouse. It’s gorgeous and functional. And more so, I learned a LOT about building.

img_20160913_185957